Admin Interface
This page is obsolete. It is kept here for archival purposes, but for an up-to-date version please see the DigiPal Framework wiki on GitHub at https://github.com/kcl-ddh/digipal/wiki/.
Introduction
The DigiPal framework stores all your information in a relational database (more on this later) and offers a visual environment to edit its content. This environment is called the 'admin interface'. It is basic but user-friendly and its main quality is to be entirely web based. This means that:
- you can browse and edit your database from any connected device
- you can work collaboratively with other people and see each others modification in real time
- changes are immediately visible on your website
Relational Database
A relational database breaks the information into interrelated tables (each table corresponds to a type of object or a concept, e.g. a text or an editor). Each object in a table is represented by a its own record. Each record assigns values to a set of fields or attributes (e.g. the shelfmark of a manuscript). The fields are defined at the table level so all records in a table contains the same fields. Each record in the database is identified by unique number (relative to its table), called its 'record ID'.
Note that complex objects can be represented by multiple records stored in different tables (e.g. a manuscript can be made of a Historical Item, an Item Part and a Current Item). Those records are joined together via foreign keys (also called a link or a reference field). A foreign key is a special type of fields which value is a reference to a record in another table (i.e. the 'record ID'). For instance a record in the Historical Item table contains a foreign key to one record Item Type (e.g. a charter, a manuscript). This is one fundamental concept of a relational database as it helps prevent data duplications and inconsistencies. If you discover that 'Charter' is misspelled you just have to correct the name of the corresponding Item Type record rather than correcting all the Historical Item records of type 'Charter'.
The Admin Interface
The Admin Interface allows you to navigate through the database through three main views:
- the Index: a list of all the tables in the database
- the Change List: the list of all the records in a table
- the Edit Form: the list of all the fields in a record and their values
Note that this organisation is hierarchical (first you select a table, then a record, then you can view the fields of this record).
You will find a 'breadcrumb' in the top left corner of any page in the Admin Interface. If the breadcrumb reads 'Home › Digipal › ItemPart' it means that you are on the Change List for the Item Part table. If you click 'Home' you'll see the Index.
The URL you see in your browser is unique for any table and record in the database. This is very convenient when you want to bookmark a particular record or reference it in an email.
The Index
To access the database, go to the table index page (/admin). If you are not logged in yet the system will ask you for your username and password.
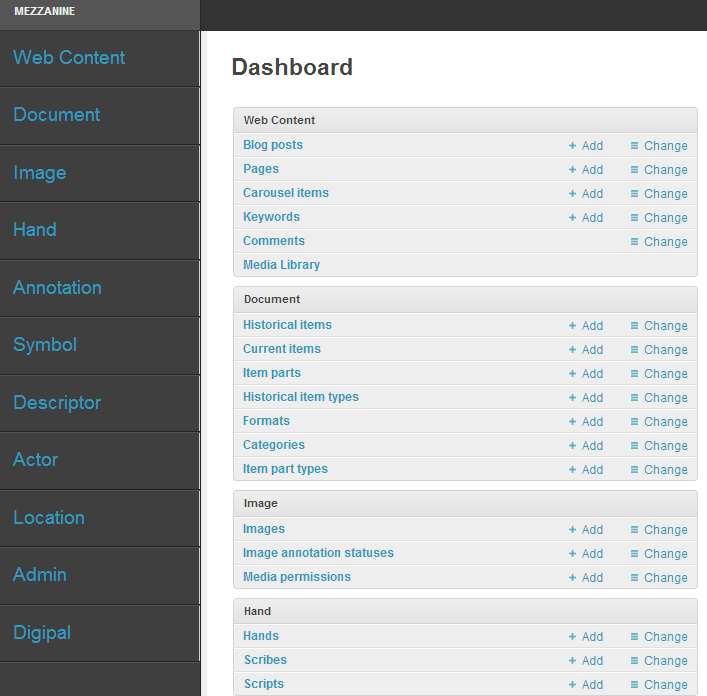
The above screen shot shows the Index. The tables have been grouped into fairly arbitrary categories to help you navigate to the right place (e.g. 'Historical Item' is the first table under 'Document' category). The categories are listed on the left hand side. Click one to expand it and see the table it contains. Alternatively you can use the full index in the middle of the page. Clicking a table name will lead you to its Change List.
The Change List
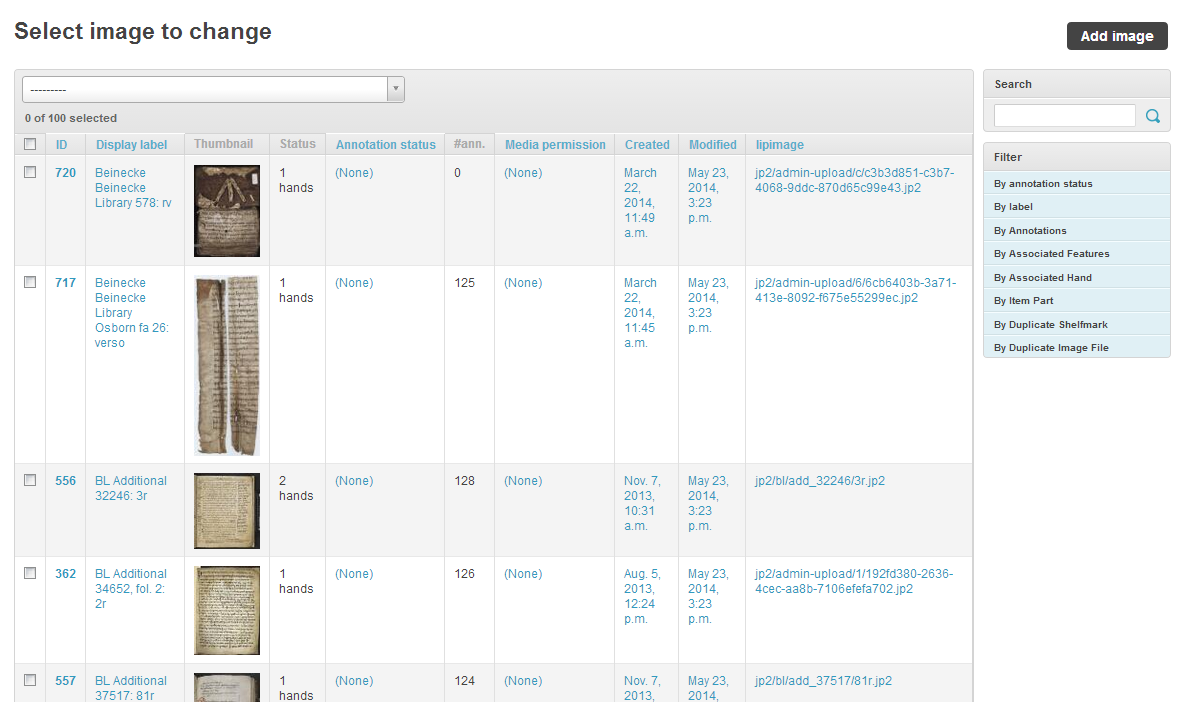
The screen shot above is the Change List for the Image table. This view shows a grid where each column heading is the name of a field, each line represents a record in the selected table and each cell is the value the record take for that field. The total number of records in the table is displayed at the bottom of the page. DigiPal only shows 100 records per page so you have to use the navigation bar to browse through subsequent pages.
If you click on a field name, the record list will be sorted by this field. If you click again on the same field name, it will be sorted in the reverse order.
There is a search box just on the right of the grid. If you type something there and click the magnifier icon or press enter, the grid will only show the records which contains all of the keywords you have typed. This keywords are case-insensitive and can match part of words (e.g. 'brit lib' will find all records with 'British Library' in the label field). Note that only the fields displayed in the grid can be searched on.
Sometimes, on the right hand side of the grid you'll find a box with filters. This is another way to narrow down the list of records displayed in the grid. If you click on one value under a filter only the records with that value will be listed. You can combine multiple filters at the same time.
To remove all your filters and return to the full listing click on the '(X total)' link just next to the text box.
From this page you can do two things:
- view a particular record: by clicking on any of its values in the corresponding row.
- create a new record: click on the 'Add X +' button located in the top right corner of the screen.
Both actions will take you to the Edit Form.
The Edit Form
The online form let you review and modify the fields of the selected record. You use the text boxes and drop downs to change the values then click the 'Save' button at the bottom to save your modifications to the database and return to the Change List. 'Save and add another' with save the changes and display a new empty form to create a new record. 'Save and continue editing' saves the record and stays on the same form. To cancel your changes click the back button or any other table in the left hand side panel. Please remember that your changes will be saved only if you click one of the three 'save' buttons.
There is also a red 'Delete' button to remove the record from the database. A confirmation screen with a warning message and information about the implication of the removal on other dependent records will appear before you can actually complete the deletion.
There are three other buttons at the top of the form:
- Context: Shows the connections with other records. It is useful to navigate through related records or verify that the different pieces of information are well connected in the database. Note that this button works only for a limited number of record types (E.g. Item Part, Historical Item);
- History: Lists all the editorial actions done on this record with information about the modified fields, the author of the modification and the time and date;
- View on Site: is a kind of preview. A click here will transport you to the public facing web page for this record.
On the form itself you will see different types of fields:
- some of them appear only as non-editable labels (e.g. the Display Label on the above screen shot). The value of these fields is derived from other fields;
- other will appear as a simple text box (e.g. locus), although the content is free it is advisable to adhere to some formatting rules to keep your field consistent across your database. In some cases the instructions and formatting rules will be provided with a small legend under the text box.
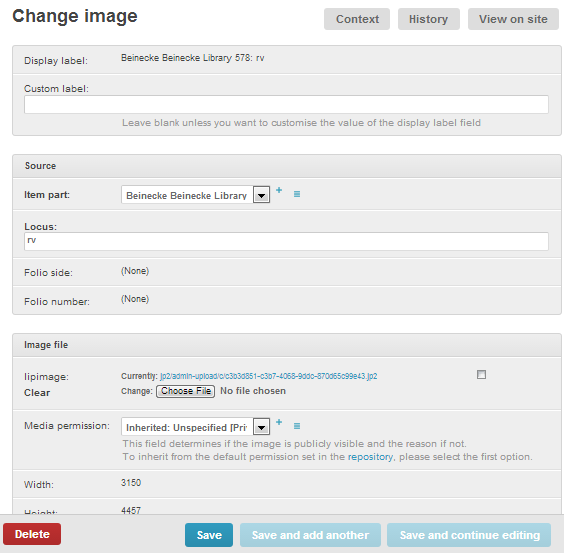
- drop downs is used for foreign keys to other records. In the above screen shot we see that the image record relates to the Item Part 'Beinecke Library 578'. There are two small blue icons on the right hand side of each drop down,:
- The plus sign allows you to create a new related record. For instance if your image refers to an Item Part which does not yet exist, you click the + to open a new empty form for the creation of a new Item Part record. When you close that new form, you'll return to the Image record form and your new Item Part should be selected in the drop down.
- The three bars sign opens the form of the record currently selected in the drop down. In the illustration above, a click would open the 'Beinecke Library 578' Item Part form to let you review its data or change it before returning to the original form.
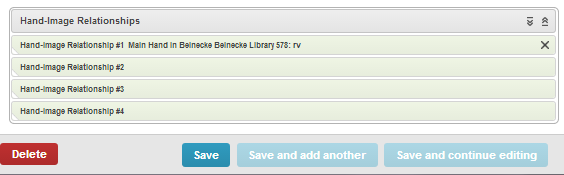
The last sections of the forms often contain expandable links to related records. This usually happens when the current record can have more than one connection to other record types. The above screen shot shows the bottom of the Image form we saw earlier. It is a list of connections between the current Folio Image and the Hands which wrote on that folio. There is only one hand defined here: the 'Main hand'. Clicking this hand entry will show a form to edit the record or a drop down to select the related Hand record. You can remove the connection by clicking the cross near the right border. If you want to define one more hand just click on the second entry called 'Hand-Image Relationship #2' and select a Hand in the drop down. You can also click the plus sign as explained above to add the hand record if it not yet in the database.
Geoffroy Noel